Single-Feed Makgeolli Recipe
Makgeolli has several types/classifications. The easiest way to explain it (IMO) is to classify them by the number of feeds. I previously wrote about Samyangju 삼양주, which has three feeds, but there are also two-feed and single-feed varieties.
This is a basic recipe taken from the makgeolli book I purchased a while back.
Please visit the previous makgeolli post for a list of tools for making makgeolli.
The Recipe:
This recipe is for a small batch (1-2 liter yield) single-feed makgeolli. The recipe has 3 ingredients, each requiring some preparation, but it is a much shorter process than samyangju since it is single-feed. I consider this a simple recipe, but it is not the simplest. For example, there are recipes where the process can be further shortened by adding yeast. The addition of yeast decreases brewing time and forgoes the need to specially prepare the nuruk. On the other hand, this recipe is very simple in terms of ingredients, and for this reason it may become the subject of future experimentation.
In the previous samyangju recipe I stated that there were only 3 ingredients. There are actually 4 if you consider the 2 kinds of rice (flour and grain).
Ingredients
For this recipe plain glutinous/sweet rice (찹쌀) is used.
The nuruk (누룩가루) used should be a coarse powder.
The final ingredient is water. I recommend using filtered or bottled water.
The amount of ingredients used is as follows:
NB: some ingredients are measured in volume while others are measured in mass.
NB: some ingredients are measured in volume while others are measured in mass.
- (찹쌀) glutinous rice - 800 ml
- (누룩가루) nuruk - 200 g
- water - 1 liter (room temperature or slightly cooler)
- NB: This does not include the amount of water used to soak/steam rice or boil nuruk! If you need advice/instruction on how to prepare the rice, please leave a comment.
The Procedure
Follow good manufacturing and cooking processes and sterilize your equipment, especially if you are serving to others. I think this is a given so I won't talk about it in the procedure; however, if you have a question, please ask.
- Nuruk Prep
- Bring ~1 liter of water to a boil.
- While the water is coming to a boil, measure the nuruk into a measuring cup.
Once the water boils, add the nuruk to the boiling water. Stir the nuruk as you pour it into the water. You are essentially blanching the nuruk.After the water reboils wait about 30 seconds, then drain the nuruk.Immediately put the nuruk in a bowl or container and add 1 liter of filtered/bottled water listed in the ingredients section.CORRECTION: Do not boil the nuruk! Although this has worked for me it is not an accurate transcription of the recipe.- Once the water boils, remove it from the heat and let it cool to room temperature.
- Pour in the measured nuruk and soak at room temp for 3-4 hours.
- Rice Prep
- Measure rice into a large bowl and wash.
- After washing, fill the bowl with water 2-3 cm above the rice and let soak at room temp for 3-4 hours. Once soaked, the rice should increase in volume as it absorbs some water.
- Drain the rice, place in a steamer and steam for about 40 minutes, or until cooked.
- Remove the rice from the steamer and place on a flat, ventilated surface for cooling. It helps if you can elevate the cooling surface on top of a few wood blocks.
- Let the rice cool to 25 C, then place it in a large bowl.
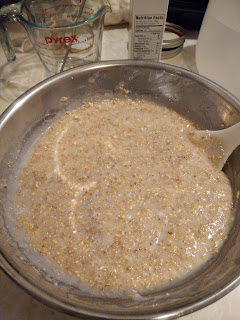
- Mixing & Fermenting
- Pour the nuruk that has been soaking into the large bowl with the rice; mix well with hands.
- Place the mixture into an onggi or fermentation container. If using an onggi, place a layer of plastic wrap, hanji, or wax paper loosely over the mouth of the container, and then put the lid on. (I do this to keep moisture in and dust out.)
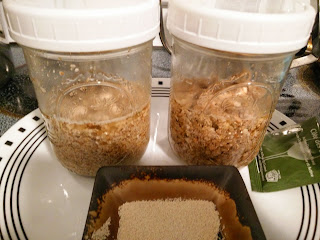
- Keep it at 25 C for 4-5 days. Check on it every 12 hours or so for signs of mold/spoilage.
- After 3 days or so, the rice should noticeably start to separate from the liquid. As the makgeolli ferments and the micro-organisms eat the rice, it will sink to the bottom of the container. When the makgeolli is ready, the majority of the rice will have sunk to the bottom of the container and it will appear as if the alcohol has gathered at the surface. There may also be a thin layer of rice still floating at the top, which is also acceptable.
Note: I have made this recipe with good results. It was one of the milkiest makgeolli I've had; very smooth and a little thick, maybe even silky. When I made it the fermentation took about 2 days longer than the book suggested, which brought brewing time to about 7 days. There are several possible reasons for this. The most likely reason is that it's winter in Korea, a.k.a. damn cold. I use a heating pad to keep the onggi as close to 25 C as possible, but the heat likely isn't constant. At lower temperatures, makgeolli will take longer to brew. In general, you want to makgeolli to breathe a little bit, so the seal on your container should not be airtight.
Please leave a comment if you have any questions or suggestions!
Please leave a comment if you have any questions or suggestions!
Comments
Post a Comment